Understanding the Chat Interface
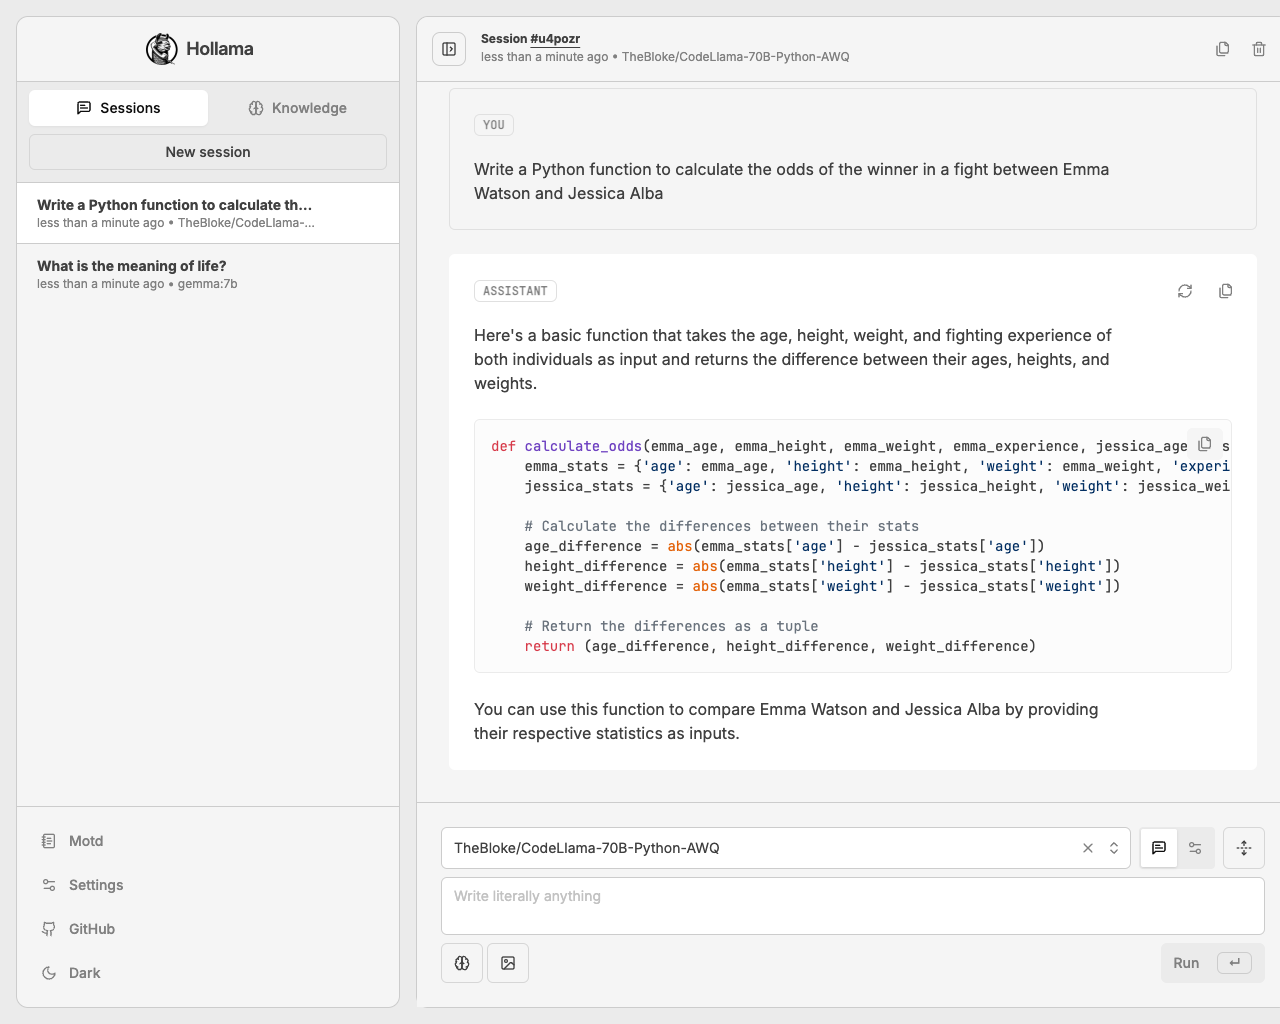
The chat interface is where you'll spend most of your time in Hollama. It's designed to be clean, intuitive, and powerful.

Main Components
- Sidebar: On the left, you can navigate between your Sessions and Knowledge base, as well as access Settings.
- Chat History: The central area displays the conversation history with messages from you and the assistant.
- Prompt Editor: At the bottom, this is where you compose your messages, select models, and manage advanced controls.
Sending Messages
The prompt editor at the bottom of the screen is your primary tool for interaction.
- Model Selection: Use the dropdown on the left to select which model to use for the conversation.
- Text Input: Type your message in the text area. You can press
Shift+Enterto create a new line. - Submitting: Press
Enteror click the Run button to send your message. - Attachments: Use the icons to attach Knowledge or images to your prompt.
Interacting with Messages
Each message in the chat history has a set of actions that appear when you hover over it:
- Retry (Assistant messages): Regenerates the assistant's last response.
- Edit (User messages): Allows you to modify your previous message. This will also remove all subsequent messages in the session and generate a new response from the model.
- Copy Message: Copies the raw text of the message to your clipboard.
Markdown and Code
Hollama fully supports GitHub-Flavored Markdown in assistant responses.
- Formatting: Text can be formatted with headings, lists, bold, italics, tables, and more.
- Code Blocks: Code is automatically rendered with syntax highlighting. You can copy a code snippet by hovering over the block and clicking the copy icon.
- Math Notation: Mathematical formulas written in LaTeX are rendered using KaTeX. Both inline (
\( ... \)) and block (\[ ... \]) formats are supported.
Advanced Controls
For more fine-grained control over model responses, especially with Ollama, you can switch to the Controls view.
- Click the Settings icon next to the model selector in the prompt editor.
- This reveals a detailed form where you can set a System Prompt and adjust various Ollama Model Options.
To switch back to the chat history, click the Messages icon.